GIF89a;

Priv8 Uploader By InMyMine7

Linux business89.web-hosting.com 4.18.0-553.44.1.lve.el8.x86_64 #1 SMP Thu Mar 13 14:29:12 UTC 2025 x86_64
Admin – Page 23 – Thesdans

Author: Admin

  • Assurance rc

    Courtier en assurances professionnelles

    Simplifions l’assurance, réduisons les tracas pour permettre à nos clients de se concentrer sur ce qu’ils font de mieux : faire prospérer leur entreprise

    La protection de votre entreprise

    Nous sommes dédiés à la protection de votre entreprise. Notre expertise en assurance vous offre la tranquillité d’esprit dont vous avez besoin pour faire face aux défis du monde des affaires.
    Faites confiance à notre engagement envers la sécurité de votre entreprise et concentrez-vous sur votre réussite.

    Optimiser votre budget d’assurance

    Nous nous engageons à optimiser votre budget d’assurance. Grâce à notre expertise, nous vous aidons à trouver les meilleures protections qui répondent à vos besoins spécifiques tout en respectant votre budget.

    Faites confiance à notre approche personnalisée pour maximiser la valeur de votre investissement en assurance. Assurance rc

  • How To Swim In Animal Crossing: Dive Into Island Fun And Exploration

    How To Swim In Animal Crossing: Dive Into Island Fun And Exploration

    Are you ready to dive into a whole new world of excitement and adventure?

    In Animal Crossing, swimming has taken center stage, allowing you to explore the ocean depths and discover a whole new array of underwater wonders.

    By obtaining a wetsuit, you can embark on thrilling underwater expeditions and encounter fascinating sea creatures.

    With our guide, you’ll learn the essential diving techniques to navigate the ocean with ease and catch elusive marine life.

    But it doesn’t stop there! Uncover sunken treasures that are waiting to be found and decorate your island with these unique underwater finds.

    Get ready to enhance your island experience like never before as you swim in Animal Crossing and dive into a world of island fun and exploration.

    Let’s get started on this aquatic adventure!

    Key Takeaways

    • Animal Crossing introduces swimming and underwater exploration with the addition of a wetsuit.
    • Look for bubbles rising from the seabed to find sea creatures.
    • Swim slowly and quietly to increase your chances of success.
    • Decorate your island with the treasures you’ve discovered underwater.

    Getting Started: Obtaining a Wetsuit

    Ready to dive into the world of underwater adventures? Let’s start by getting your hands on a stylish wetsuit!

    In Animal Crossing, obtaining a wetsuit is essential for swimming and exploring the vast ocean surrounding your island. To get one, simply head over to the Nook’s Cranny shop or visit the Able Sisters’ Tailor Shop. They offer a variety of wetsuits in different colors and designs, so you can choose the one that suits your style.

    Once you have your wetsuit, it’s time to hit the water! Just approach any beach or pier, press A to equip your wetsuit, and dive right in. Explore the depths of the ocean, discover hidden treasures, and encounter fascinating sea creatures.

    So, grab your wetsuit and get ready for some unforgettable underwater adventures in Animal Crossing!

    Exploring the Ocean Depths: Diving Techniques

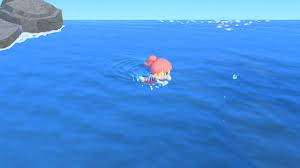
    First, equip your snorkel and flippers, then plunge into the crystal clear water, feeling the coolness envelop your body as you descend into the mysterious depths of the ocean.

    As you dive deeper, keep an eye out for bubbles rising from the seabed – they indicate the presence of sea creatures. Swim towards them and press the A button to start diving.

    Once underwater, use the control stick to swim around and explore. Look for shadowy shapes moving beneath you, signaling the presence of marine life. Get closer and press the Y button to catch the creatures. Be careful not to scare them away! Some creatures can be quite elusive and fast, so be patient and stay focused.

    Remember to resurface for air when your character begins to run out of breath.

    Enjoy the thrill of discovery as you uncover new and fascinating creatures lurking beneath the waves.

    Discovering Underwater Creatures: Tips for Catching Sea Life

    As you venture deeper into the ocean depths, brace yourself for the thrill of discovering and capturing the mesmerizing sea creatures that reside there. Animal Crossing: New Horizons offers a wide variety of underwater creatures for you to find and add to your collection.

    To increase your chances of success, be sure to swim slowly and quietly, as sudden movements can scare away the creatures. Keep an eye out for bubbles rising to the surface, as they indicate the presence of a creature nearby.

    Once you spot one, dive down and approach it cautiously. When you’re close enough, press the A button to catch it with your net. Remember to be patient and persistent, as some creatures may be more elusive than others.

    With these tips in mind, you’ll soon become a master at capturing sea life in Animal Crossing: New Horizons.

    Uncovering Hidden Treasures: Finding Sunken Items

    Now, let’s embark on an exciting journey to uncover hidden treasures lurking beneath the ocean’s surface. Finding sunken items will add a whole new level of excitement to your underwater exploration! As you dive into the crystal-clear waters of Animal Crossing, keep an eye out for telltale bubbles rising from the seabed. These bubbles indicate the presence of a buried treasure.

    To retrieve the sunken item, simply swim towards the bubbles and press the A button to dive down. As you approach the treasure, it’ll slowly rise to the surface. Keep in mind that some items may be harder to spot than others, so be sure to explore every nook and cranny of the sea floor. Who knows what valuable items you’ll find?

    Happy hunting!

    Interacting with Marine Life: Meeting Sea Creatures

    Get ready to embark on an exciting adventure as you discover the wonders of the ocean and meet fascinating sea creatures! As you dive into the crystal-clear waters of Animal Crossing, be prepared to encounter a wide variety of marine life that’ll leave you in awe.

    From vibrant coral reefs to enchanting seagrass meadows, each area is teeming with unique sea creatures just waiting to be discovered.

    As you explore, keep an eye out for the telltale shadows beneath the water’s surface. These shadows indicate the presence of a sea creature nearby. Swim towards it and get ready to dive deeper into the ocean to uncover its true identity.

    Equipped with your trusty diving suit and snorkel, you can approach the sea creatures up close and personal. Greet them with a friendly wave and watch as they gracefully swim around you.

    Interacting with these magnificent creatures isn’t just a thrilling experience, but also an opportunity to learn more about them. By donating your findings to the museum, you can contribute to the knowledge and understanding of the island’s marine ecosystem.

    So, dive in and prepare to be amazed by the captivating world that awaits you beneath the waves!

    Enhancing Your Island Experience: Decorating with Underwater Finds

    Immerse yourself in the enchanting world beneath the waves by decorating your island with the treasures you’ve discovered during your underwater exploration. Transform your island paradise into a vibrant and captivating underwater oasis by showcasing your collection of sea creatures, shells, and other underwater finds.

    Create stunning displays by placing colorful coral and seaweed in strategic locations, adding a splash of life and color to your island. Hang up seashell garlands and string lights to create a whimsical and magical atmosphere.

    Don’t forget to incorporate your newfound sea creature friends into your island’s aesthetic by placing them in aquariums or designing a dedicated underwater exhibit. With your creativity and the wonders of the deep, your island will become a true underwater paradise that will leave your visitors in awe.

    Frequently Asked Questions

    Can I swim in Animal Crossing without a wetsuit?

    No, you cannot swim in Animal Crossing without a wetsuit. The wetsuit is essential for diving into the water and exploring the ocean. So make sure to get one before taking a dip!

    How do I obtain a wetsuit in Animal Crossing?

    To obtain a wetsuit in Animal Crossing, you can purchase one from Nook’s Cranny or the Nook’s Cranny drop-off box. You can also get one by redeeming Nook Miles at the Nook Stop.

    Are there different types of wetsuits in Animal Crossing?

    Yes, there are different types of wetsuits in Animal Crossing. You can find them at the Nook’s Cranny shop or get them from other players. Each wetsuit has a unique design and color.

    Can I catch fish while diving in Animal Crossing?

    Yes, you can catch fish while diving in Animal Crossing. Dive into the water and keep an eye out for fish shadows. Swim towards them and press A to catch them just like you would on land.

    Are there any special rewards for finding sunken items in Animal Crossing?

    Yes, there are special rewards for finding sunken items in Animal Crossing. You can discover valuable items like pearls, DIY recipes, and even special sea creatures to add to your collection. Happy diving!

    Conclusion

    So dive into the world of Animal Crossing and experience the thrill of swimming! With your wetsuit in hand, you can explore the depths of the ocean, discovering a whole new world of underwater creatures and hidden treasures.

    Interact with marine life and decorate your island with your underwater finds to enhance your island experience.

    So get ready to make a splash and have some island fun!

  • How To Reset Google Home: Starting Fresh With Your Smart Assistant

    How To Reset Google Home: Starting Fresh With Your Smart Assistant

    Are you looking to start fresh with your Google Home smart assistant? Maybe you want to troubleshoot common issues or simply want to clear out all the settings and start over. Whatever the reason may be, resetting your Google Home is a straightforward process that can be done in just a few steps.

    In this article, we will guide you through the process of resetting your Google Home, from backing up your settings to reconnecting it to your Wi-Fi network. We will also provide troubleshooting tips to help you overcome any obstacles along the way.

    So, if you’re ready to give your Google Home a fresh start, let’s dive in and get started!

    Key Takeaways

    • Resetting Google Home erases all personalized settings and data, so it is important to backup settings before resetting.
    • There are two methods to reset Google Home: holding the microphone mute button or using the physical reset button on the back of the device.
    • After a factory reset, Google Home needs to be reconnected to the Wi-Fi network by forgetting the network and adding a new device in the Google Home app.
    • To troubleshoot common issues, ensure a stable Wi-Fi connection, restart Google Home, and update the app and device software. If problems persist, a factory reset may be necessary.

    Understanding the Resetting Process

    Are you ready to give your Google Home a fresh start? Let’s dive into the process of resetting your smart assistant and discover how easy it is to get your device back to its original settings.

    To reset your Google Home, start by locating the microphone mute button on the back of the device. Press and hold it for about 15 seconds until you hear a sound and the lights on the top of your Google Home start flashing. This means the reset process has begun.

    After a few moments, your Google Home will restart and you can set it up again from scratch. Keep in mind that resetting your Google Home will erase all your personalized settings and data, so make sure to back up any important information before starting the process.

    Backing Up Your Google Home Settings

    To ensure you never lose your personalized settings, it’s important to back up the preferences on your trusty sidekick. Luckily, Google Home makes it easy to do just that. By backing up your Google Home settings, you can quickly restore your preferences after resetting your device.

    To get started, open the Google Home app on your smartphone and tap on the device you want to back up. Then, tap on the settings gear icon in the top right corner and scroll down to the ‘More’ section.

    Here, you’ll find the ‘Backup and reset’ option. Simply tap on it and toggle the ‘Backup my settings’ switch to enable the feature.

    Now, whenever you reset your Google Home, you can rest assured that your personalized settings will be safely stored and ready to be restored.

    Performing a Factory Reset on Google Home

    When you decide to restore your Google Home to its original settings, you’ll embark on a transformative journey of rediscovering the true potential of your intelligent companion.

    Performing a factory reset on your Google Home is a simple process that will wipe all of your personal settings, data, and preferences.

    To start, locate the physical reset button on the back of your device. Press and hold the button for about 15 seconds until you hear a sound and the Google Home’s lights start flashing. This indicates that the factory reset is in progress.

    Once the reset is complete, your Google Home will restart and be ready to set up again from scratch. Remember to reconfigure your device and personalize your settings to make it truly yours.

    Reconnecting Google Home to Your Wi-Fi Network

    After performing a factory reset, you can easily reconnect your Google Home to your Wi-Fi network. To do this, start by opening the Google Home app on your smartphone or tablet. Tap on the device you want to reconnect and then tap on the gear icon to access the device settings.

    From there, scroll down and select ‘Wi-Fi.’ Next, tap on ‘Forget this network’ and confirm the action.

    Now, go back to the main screen of the Google Home app and tap on the ‘+’ icon to add a new device. Follow the on-screen instructions to connect your Google Home to your Wi-Fi network.

    Once connected, you can enjoy all the features and capabilities of your smart assistant again.

    Setting Up Google Home Again

    Reconnecting your Google Home will bring back all the convenience and excitement of having a personal smart companion. To set up Google Home again, start by plugging it into a power source and wait for the multicolored lights to appear.

    Open the Google Home app on your smartphone and tap on the ‘+’ icon to add a new device. Select ‘Set up device’ and choose ‘New devices’ followed by ‘Google Home’. Make sure your smartphone and Google Home are connected to the same Wi-Fi network.

    Follow the on-screen instructions to complete the setup process, including connecting to your Wi-Fi network and signing in to your Google account. Once you’ve finished, your Google Home will be ready to use again, ready to assist you with all your daily tasks and queries.

    Troubleshooting Common Issues

    To get your Google Home up and running smoothly, troubleshoot common issues that may arise along the way. If you’re experiencing any problems with your Google Home, there are a few troubleshooting steps you can take.

    First, make sure that your Google Home is connected to a stable Wi-Fi network. Check that the Wi-Fi password is correct and that the signal is strong enough.

    If the issue persists, try restarting your Google Home by unplugging it from the power source, waiting for a few seconds, and plugging it back in.

    Additionally, ensure that your Google Home app is up to date and that your device’s software is also updated.

    If all else fails, you can perform a factory reset on your Google Home to start fresh and resolve any persistent issues.

    Frequently Asked Questions

    Can I reset Google Home without losing all of my settings and preferences?

    No, you cannot reset Google Home without losing all of your settings and preferences. Resetting will restore it to its factory settings, erasing all personalized data.

    Will performing a factory reset on Google Home delete all of my connected smart home devices?

    Performing a factory reset on Google Home will erase all of your connected smart home devices. This means you will have to set them up again after the reset is complete.

    How long does it take to complete the resetting process for Google Home?

    The resetting process for Google Home typically takes around 5 minutes to complete. During this time, your device will be restored to its factory settings, erasing all personal data and configurations.

    Is there a way to reset Google Home using voice commands instead of the physical reset button?

    Yes, you can reset Google Home using voice commands. Just say, “Hey Google, factory reset” or “Hey Google, reset all settings.” This will restore your Google Home to its original settings.

    Can I reset Google Home from the Google Home app on my smartphone?

    Yes, you can reset Google Home from the Google Home app on your smartphone. Simply open the app, go to the device settings, and choose the option to factory reset your Google Home.

    Conclusion

    So there you have it – a simple and straightforward guide on how to reset your Google Home and start fresh with your smart assistant. By understanding the resetting process, backing up your settings, performing a factory reset, reconnecting to your Wi-Fi network, and setting up Google Home again, you can easily troubleshoot any common issues you may encounter.

    With these steps, you’ll be well on your way to enjoying a seamless and hassle-free experience with your Google Home.

  • How To Reset Apple Tv Remote: Troubleshooting Made Simple

    How To Reset Apple Tv Remote: Troubleshooting Made Simple

    Are you having trouble with your Apple TV remote? Don’t worry, troubleshooting it is easier than you think. In this article, we will guide you through the simple steps to reset your Apple TV remote.

    By following these instructions, you can quickly identify any issues, check the battery level and connection, perform a soft reset, pair your remote with your Apple TV, and update the software. Resetting your remote can help resolve common problems such as unresponsive buttons or connectivity issues.

    If you’re still facing difficulties after trying these troubleshooting steps, we’ll also provide information on how to contact Apple Support for further assistance.

    So, let’s get started and get your Apple TV remote back in working order.

    Key Takeaways

    • Resetting the Apple TV remote can resolve issues with unresponsive buttons or connectivity problems.
    • Checking the batteries and replacing them if low is an important step in troubleshooting the remote.
    • Ensure there are no physical damages or obstructions blocking the signal between the remote and Apple TV.
    • Pairing the remote with Apple TV and updating the software can help resolve any issues.

    Identifying the Issue with Your Apple TV Remote

    If your Apple TV remote isn’t responding, it’s crucial to determine the issue so you can quickly get back to streaming your favorite shows.

    Start by checking the batteries in your remote. Low battery power can cause unresponsiveness.

    If the batteries are fine, try resetting the remote by unplugging your Apple TV for about 30 seconds and then plugging it back in. Sometimes, a simple power cycle can resolve the problem.

    If this doesn’t work, check for any physical damage or obstructions on the remote. Clean the buttons and make sure they’re not stuck.

    Additionally, ensure that there are no obstacles blocking the signal between the remote and the Apple TV.

    By identifying the issue with your Apple TV remote, you can troubleshoot and resolve the problem effectively.

    Checking the Battery Level and Connection

    To make sure your Apple TV remote is working properly, first check how much battery life it has and make sure it’s connected correctly. Start by removing the battery cover at the back of the remote and checking the battery level. If it’s low, replace the batteries with new ones.

    Next, check the connection between the remote and the Apple TV. Make sure the remote is within range and there are no obstacles blocking the signal. If the connection seems weak, try resetting the remote by pressing and holding the Menu and Volume Up buttons simultaneously for about five seconds. This should reestablish the connection between the remote and the Apple TV.

    If the battery level and connection are both fine, but the remote still isn’t working, it may be a different issue that requires further troubleshooting.

    Performing a Soft Reset on Your Apple TV Remote

    Performing a soft reset on your Apple TV remote can quickly resolve any minor issues you may be experiencing. To do this, simply hold down the Menu button and the Volume Up button simultaneously on your remote for about six seconds.

    You will see a light on the front of the remote blink rapidly, indicating that the reset process has begun. After the reset, your remote should automatically reconnect to your Apple TV.

    This method is useful when your remote is not responding or behaving erratically. It’s a simple troubleshooting step that can save you time and frustration.

    Remember, a soft reset won’t delete any of your settings or data, so you don’t have to worry about losing anything important.

    Pairing Your Apple TV Remote with Your Apple TV

    Immerse yourself in the seamless experience of controlling your Apple TV with a remote that effortlessly pairs with your device. Pairing your Apple TV remote with your Apple TV is a simple process that ensures smooth navigation and easy access to all your favorite content.

    To begin, make sure your Apple TV is powered on and within range of your remote. On your Apple TV, go to the Settings menu and select ‘Remotes and Devices.’ Then, choose ‘Bluetooth’ and select ‘Pair New Device.’

    On your Apple TV remote, press and hold the Menu and Volume Up buttons simultaneously. A message will appear on your TV screen confirming the pairing process.

    Once connected, your Apple TV remote will be ready to use, allowing you to enjoy all the features and functions of your Apple TV effortlessly.

    Updating the Software on Your Apple TV Remote

    Updating the software on your Apple TV remote will transport you to a world of enhanced functionality and seamless control.

    To begin, make sure your Apple TV is connected to the internet. Then, grab your Apple TV remote and go to the Settings menu.

    From there, select General, followed by Software Updates. If an update is available for your remote, click on Download and Install. The update will then begin downloading and installing automatically.

    Be patient as this process may take a few minutes.

    Once the update is complete, your Apple TV remote will be equipped with the latest features and improvements.

    Now you can enjoy a smoother and more efficient user experience while navigating through your favorite content on Apple TV.

    Contacting Apple Support for Further Assistance

    If you’re in need of additional help, don’t hesitate to reach out to Apple Support for further assistance. They have a team of experts who are ready to help you with any issues you may be experiencing with your Apple TV remote.

    Whether it’s a problem with resetting the remote or any other troubleshooting steps, they will guide you through the process step by step.

    You can contact Apple Support through various channels, such as phone, chat, or email. They’re available to assist you 24/7, so you can reach out to them at any time that’s convenient for you.

    Don’t hesitate to ask for their help, as they’re there to ensure that you have the best experience with your Apple TV remote.

    Frequently Asked Questions

    Can I use my iPhone as a remote for Apple TV?

    Yes, you can use your iPhone as a remote for Apple TV. Simply download the Apple TV Remote app from the App Store, connect your iPhone to the same Wi-Fi network as your Apple TV, and you’re good to go.

    How do I adjust the volume on my Apple TV with the remote?

    To adjust the volume on your Apple TV with the remote, simply use the volume buttons located on the side or bottom of the remote. Press the “+” button to increase the volume and the “-” button to decrease it.

    What should I do if my Apple TV remote is unresponsive?

    If your Apple TV remote is unresponsive, try these steps: 1) Check the battery level and replace if necessary. 2) Restart your Apple TV. 3) Unpair and then re-pair the remote. If the issue persists, contact Apple Support.

    Is it possible to control multiple Apple TVs with one remote?

    Yes, it is possible to control multiple Apple TVs with one remote. By pairing the remote with each Apple TV separately, you can easily switch between them and control the desired device.

    How long should the battery in my Apple TV remote last?

    The battery in your Apple TV remote should last for about a year with normal usage. If you notice the battery life decreasing, it’s time to replace it with a new one.

    Conclusion

    In conclusion, troubleshooting your Apple TV remote doesn’t have to be a daunting task. By following the simple steps outlined in this article, you can easily identify and resolve any issues you may be experiencing.

    From checking the battery level and connection to performing a soft reset and pairing your remote, these troubleshooting methods are designed to make your Apple TV remote function like new.

    And if all else fails, don’t hesitate to reach out to Apple Support for further assistance.